3D Printer Cabinet Build: Part 5
Jun 30 2024
Finally returning to this project! Previous post can be found here
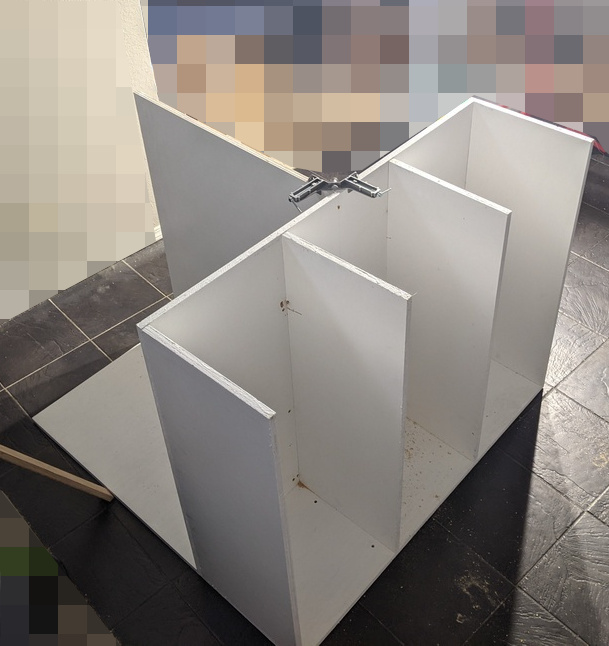
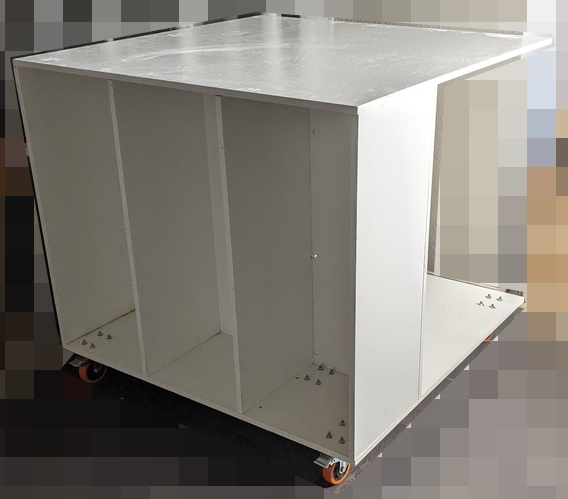
I was heading out to visit family for the 4th of July but I wanted to have the basic frame of the bottom half of the cabinet completely done before I left. At this point I had all the pieces cut and painted and now needed only to assemble.
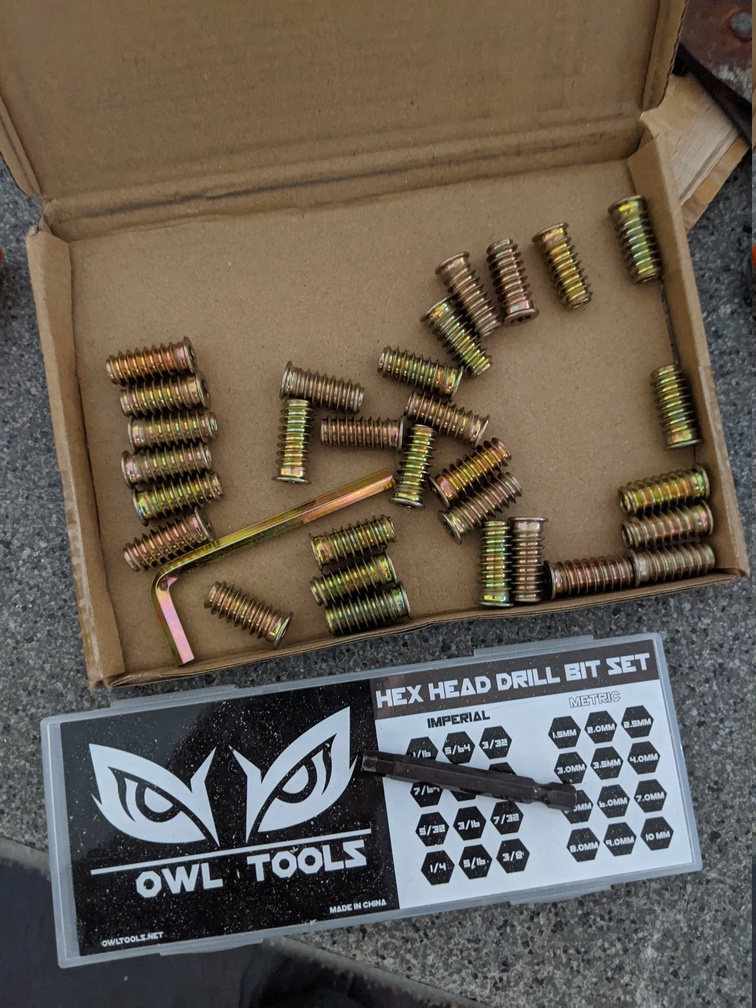
My desire to have everything fastened with threaded inserts definitely made the process much longer as I had to drill the holes through both pieces that I wanted to fasten together, then thread in the threaded insert. Thankfully I do have hex drill bits that allowed me to perform the latter step quickly. Doing them by hand would have taken ages.
Threaded inserts and the hex bit:
The process of drilling the inserts:
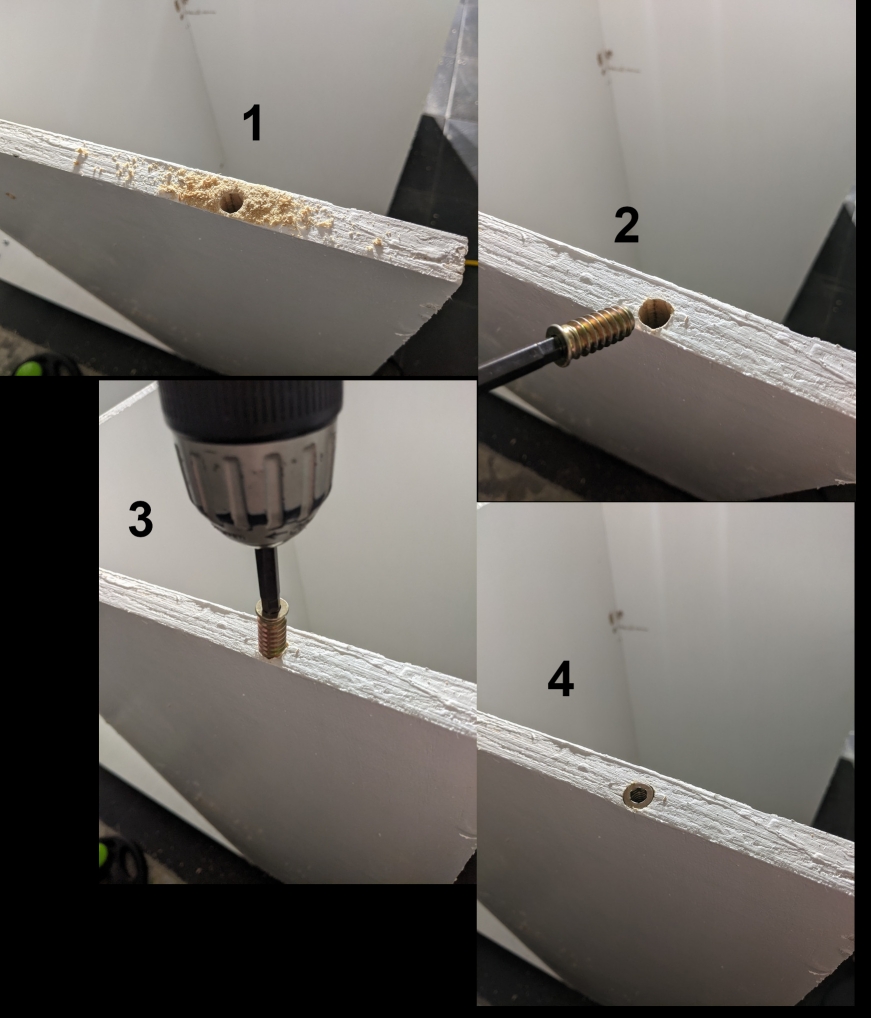
One fundamental problem I had was that drilling through both pieces at the same time to make them align meant I was completely blind in regards to where exactly I was drilling to on the other side. I'm afraid I don't have x-ray vision and I never figured out a good solution to this and just guessed, drilling additional holes if I missed. Unsurprisingly, the holes I managed to get right are far from perfectly centered in the side of 3/4" plywood. I don't think it will be too noticeable in the final product as most of these machine screw heads wont be visible from the outside.
One frustrating misstep was that I mis-measured the columns for the cubbies in the bottom half, so I had to remove some walls, shift them over, and attach with new threaded inserts. Now I have even more holes I'll need to patch up eventually.
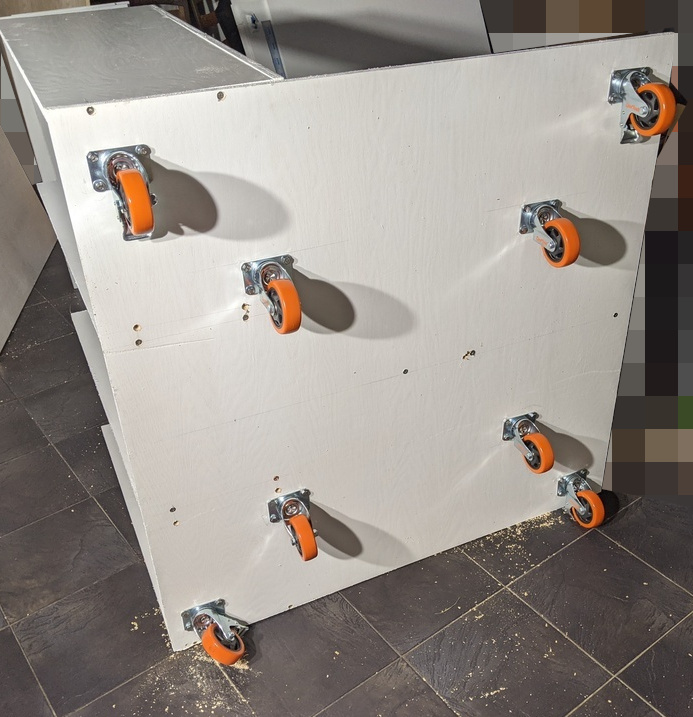
When the initial boards were fastened together I could already tell how heavy this was going to become when finished. I am glad that I decided from the very start to put this on casters! I bought a set of 8 heavy duty casters, about 5 inches in total height. 4 with brakes, 4 without. These things are solid!
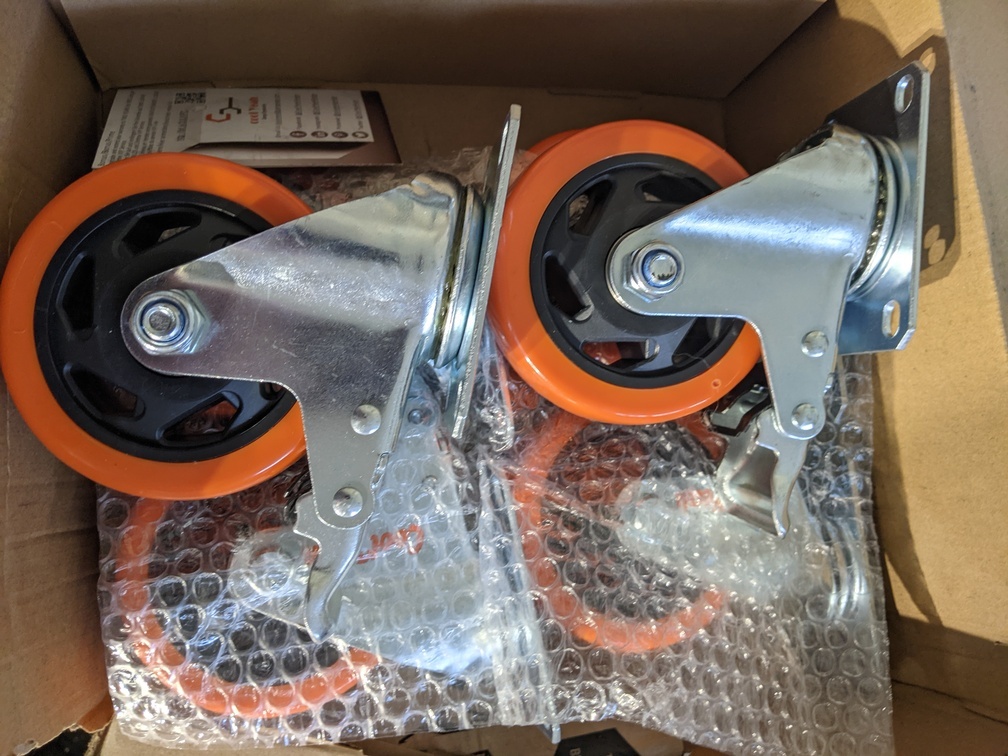
I put the 4 with brakes under the outer corners so I can reach those with my foot, and then put a "inner layer" using the remaining 4 casters. The weight seems to be well distributed with this layout, with no large areas unsupported by a caster. The 3D printer is intended to be in the center of the cabinet with support directly underneath so having casters under the center is perfect.
I am glad to have accomplished my goal before leaving for the 4th of July!
Comments
No comments yet. Be the first to comment!